MS Office Asset Selector
Available since version 4.8.0
MS Office Asset Selector requires v5.4.0+ to work on AEM as a Cloud Service.
Table of Contents
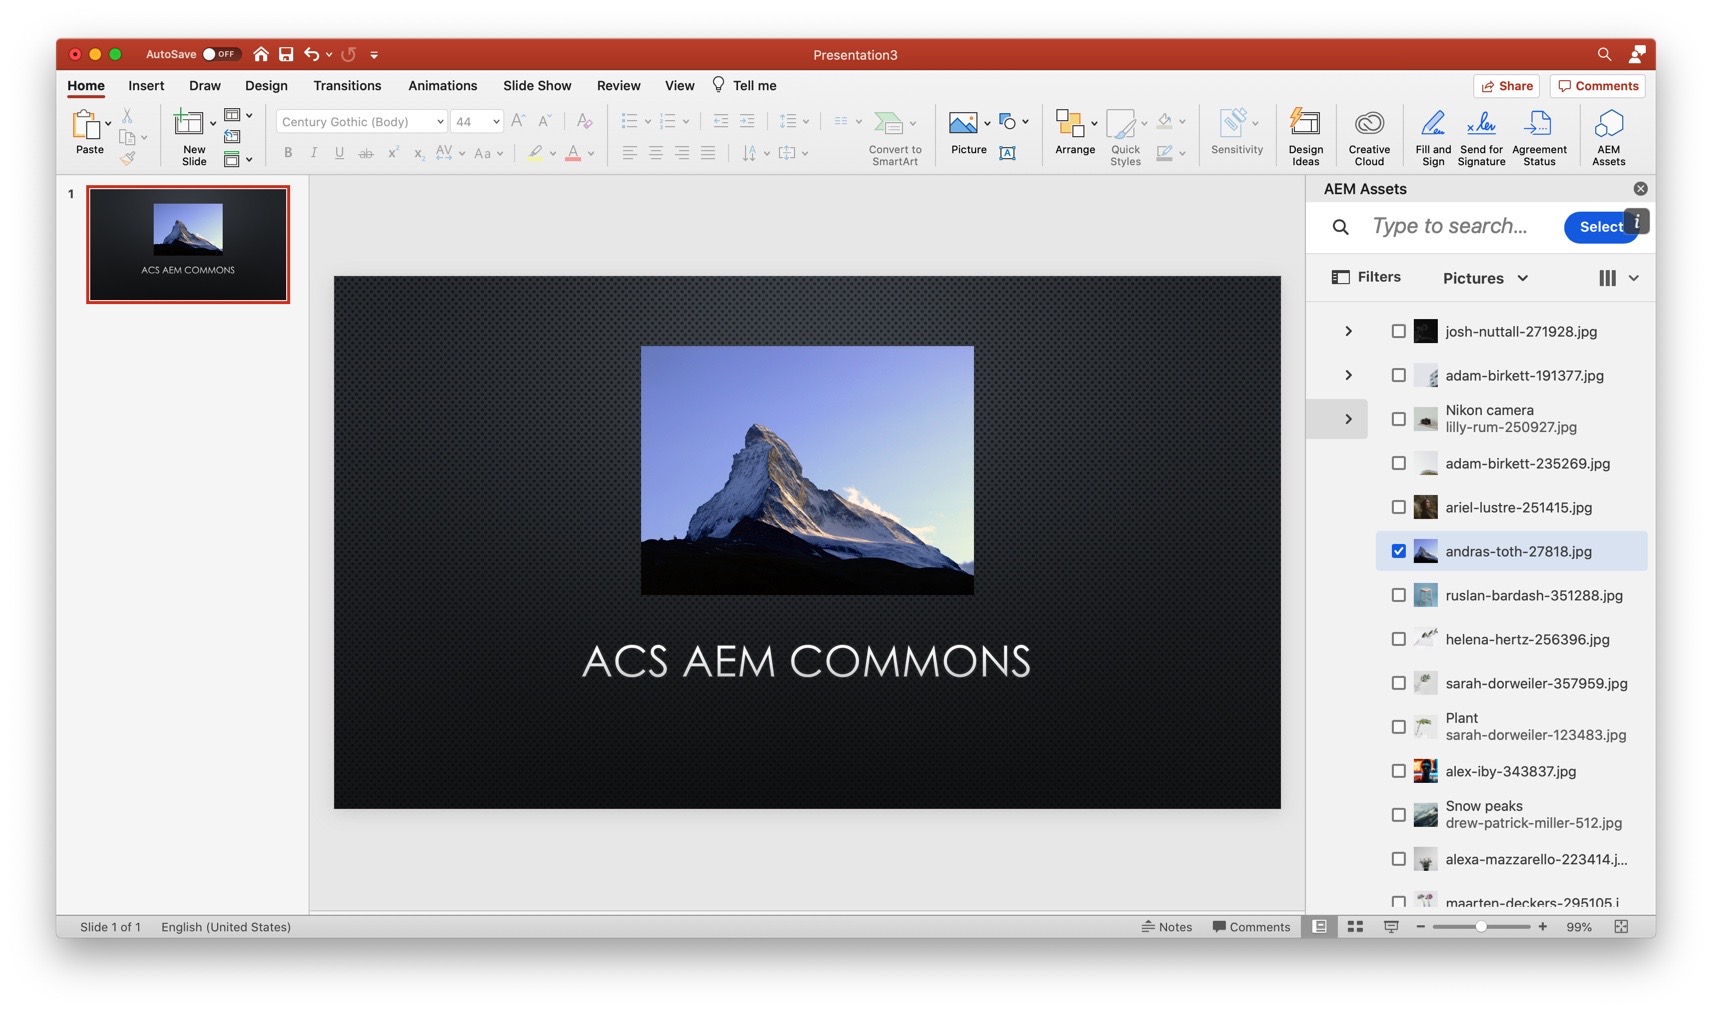
The AEM Asset Selector Office Add-in allows a company to make available an add-in to the Task Pane in Microsoft Office applications to insert images from their AEM Assets instance into these applications directly. Use of this add-in will require an active and accessible AEM Assets and AEM Sites instance and Office 365.
We provide a set of legacy manifest files as well as an updated version for AEM as a Cloud Service. Additionally, you can download a content package with just the required page, template and component.
AEM as a Cloud Service
- Download AEM as a Cloud Service
manifest.xml
- Note, the actual manifest file can have any name.
- Note, the “commands” references are needed for the manifest file to be valid. However, these are only needed for advanced add-in functionality and can be ignored in this case.
Legacy manifest
Provided are two sample manifest files, one for Microsoft Word and one for Microsoft PowerPoint. These can be used as templates for adding the plugin for other Office 365 applications.
Setup Instructions
There is some setup necessary before the add-in can be used. This is because it must be configured to direct users to the correct AEM Assets instance and a method for distributing the add-in to users easily.
AEM Configuration
Install the above content package or follow the steps below after including the full ACS Commons package.
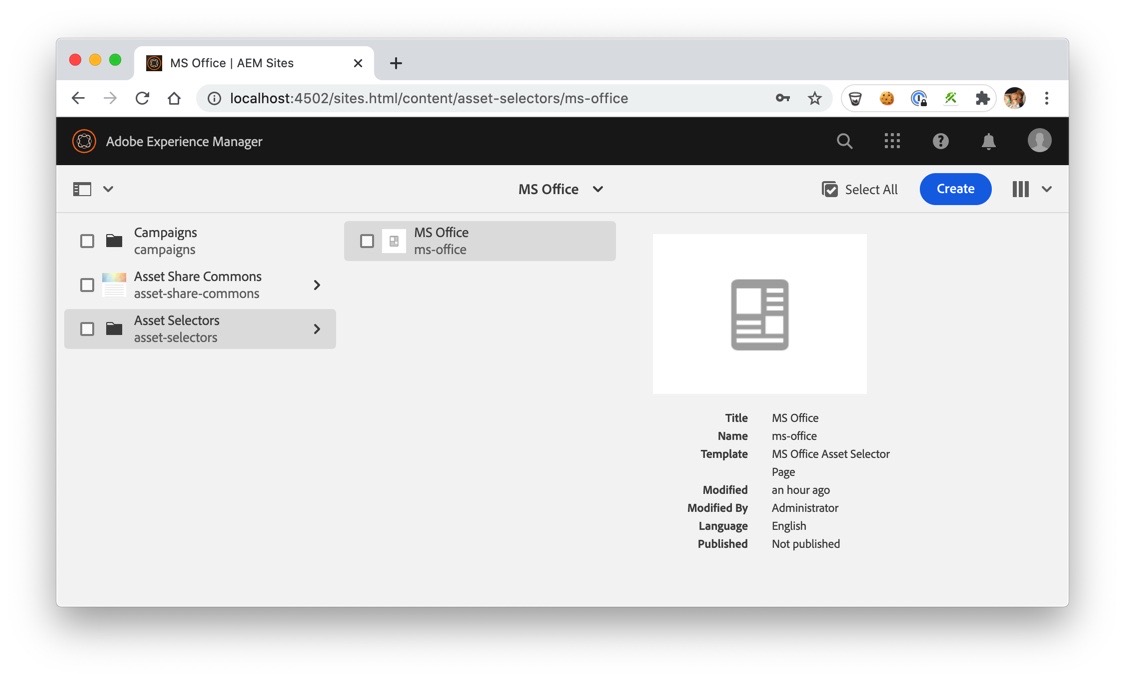
Create a new page that will act as the end-point for the MS Office Add-in interact with.
Use ACS Commons’ MS Office Asset Selector static template, which is configured to be available under the
path /content/asset-selectors.
For the most part, this is all that is necessary to begin using this add-in. However, you may want to review the information about managing access for more information on how access to content can be controlled and managed.
To ensure the necessary page is available and working, simply navigate to
/content/asset-selectors/ms-office.html in your web browser.
Office Add-in Configuration
The primary step necessary for the add-in to work is to update the manifest files to direct users to your AEM instance. Download the above Cloud manifest.xml and edit them to point to the correct URL.
Follow the Steps below:
- Update
manifest.xmlwith your deployed AEM instance url. Replacep00000-e000000with your Cloud Program IDs.- IconUrl
- HighResolutionIconUrl
- SupportUrl
- AppDomain
- SourceLocation
- bt:Images
- bt:Urls
- Adjust Strings in
manifest.xmlto your liking- DisplayName
- Description
- GetStarted.Title
- CommandsGroup.Label
- TaskpaneButton.Label
- GetStarted.Description
- TaskpaneButton.Tooltip
- Update
<Id>inmanifest.xmlto a new unique GUID- e.g
<Id>514a547d-fa44-46e2-b1c3-59e265ac0d36</Id> - https://guidgenerator.com/online-guid-generator.aspx
- https://learn.microsoft.com/en-us/javascript/api/manifest/id
- e.g
- Include and Deploy ACS Commons in your project
Distributing the Add-in
There are 3 ways to add this add-in to Microsoft Office. The first method, Network Share Catalog, is intended only for testing purposes. The other methods are suitable for distributing the add-in internally within your company.
Network Share Catalog
For development and testing purposes a network share can be setup, usually on the computer you are testing on, to load the add-in. This is generally to confirm the add-in manifest file works and that it points to the correct server and path for the asset selector page.
Microsoft has provided detailed instructions for this:
Centralized Deployment
Centralized deployment allows distribution of the add-in within your company in a secure and managed way. Through this method, the add-in manifest is made available through Microsoft’s servers by a Microsoft Office Admin within the company. The admin can control what users have access to this add-in as well. This method requires little technical experience from users as it will simply appear in their list of Admin Managed plugins in their Office Applications.
Microsoft has provided detailed instructions for this:
https://docs.microsoft.com/en-us/office/dev/add-ins/publish/centralized-deployment
Sharepoint Catalog
Use of a Sharepoint Catalog is very similar to the use of Centralized Deployment. However, instead of storing the manifest files on Microsoft’s Servers they are stored on a company Sharepoint space. This allows you to keep these files within servers which are managed by your company.
Microsoft has provided detailed directions for this:
Managing Access
There are a number of ways to manage which assets a users will be able to access when using the add-in. The first is through the use of permissions and is the recommended method. The second is through creation of additional asset selector pages configured to allow access to subtrees within the AEM Assets folders.
User Permissions (Recommended)
Using this method, only one asset selector page is needed. This page may still point to the root of the AEM Assets content. However, by assigning users to specific groups within AEM and adjusting which folders within AEM Assets users in those groups may access this will determine which assets they can access when using the add-in as well. When the add-in loads it will require that the user log into AEM and apply the permissions for the logged-in user.
Page Specific Permissions
By creating additional pages using the Asset Selector template or by copying the existing Asset Selector page, the component on this page may be edited to point to an alternate path within AEM Assets. This will become the root path that the Asset Selector will use and only assets in this folder or any subfolders of it will be accessible.
This is not the generally recommended method but can allow creating different add-ins for different groups, each pointing to a different path and limiting their available assets if this is necessary. However, it would still be recommended to simply use one add-in and use group permissions within AEM to manage their access.